Classical Still Life taught by Leah Lopez

The Leah Lopez workshop is drawing to a close this afternoon, but it has been a marvelous 3 days. All of the students are raving about Leah and what a wonderful artist and instructor she is! Some of the students were experienced still life artists but said that the insight and tips that Leah provided were a real break through for them.

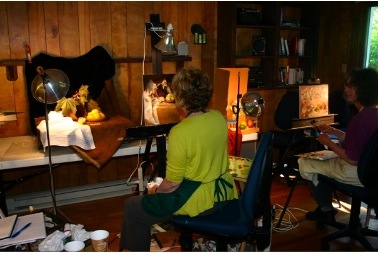
The class arrived on Thursday and the studio quickly became the still life artist enclave! Each student composed, with the assistance of Leah, the particular still life set up that they wanted to paint. A number of fruits and vegetables were “borrowed” from our kitchen for the set ups, as well as the variety of vases, tea kettles, and such in our still life object collection. A bit of the greenery of the gardens also made it’s way into some set ups.

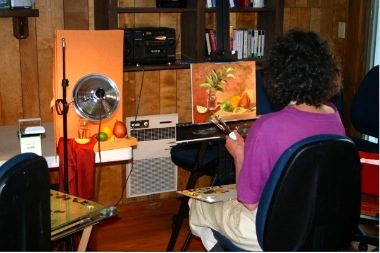
This is what Leslie G was working on the first day.

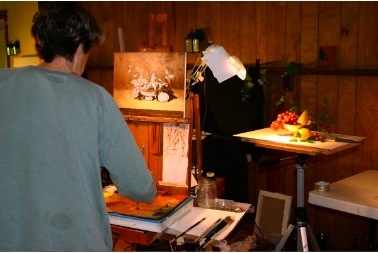
Next to Leslie was Patricia G, with another classical still life set up.


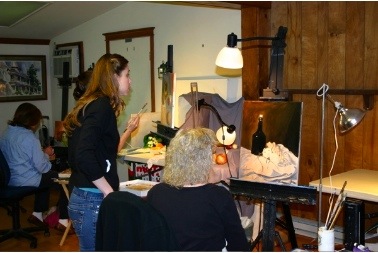
Here is Leah, standing, offering advice to Mary P with her composition.

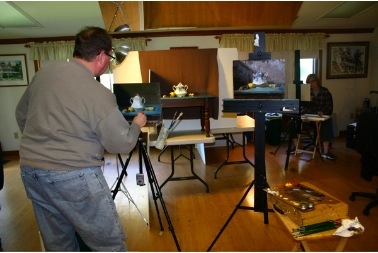
This is Jeff O, working with the same set up that Leah used for her morning demo.

Mark took more pictures this after on the final day of the workshop and I’ll post them tomorrow.


More Fun with Acrylics in Robert Burridge Workshop

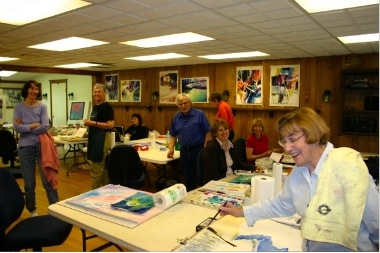
The week with Bob Burridge seemed to fly past. This big happy group painted until they dropped each day, but still laughed and had a grand time around the dinner table.

Here’s Bob showing his art director talents as he tries to get everyone to smile and look good for the class picture.

He did a great job. Look at the results!

More shots of happy “campers”. This is Gloria, part of a mother-daughter team.


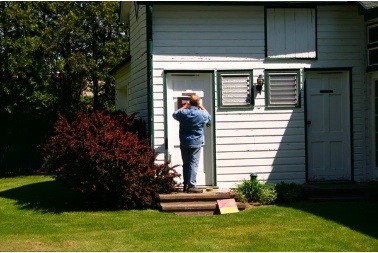
This is Bob taking picture of some of his students work in back of the studio/carriage house. Nice lighting.

More enjoyable times at the dinner table.

And this is the man himself.

If you didn’t get into this class you missed a good one. But don’t worry, Bob will be back! He is scheduled to return in 2011, May 22 – 28th. Mark your calendars now and sign up early.


Another Award for Stanley Maltzman

Stanley Maltzman, a highly acclaimed landscape artist, author, and educator, plus a really nice guy who brings us flowers every holiday, is one of our instructors at the Hudson River Valley Art Workshops.

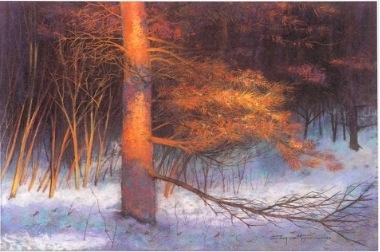
He was just notified that the painting that we used in this year’s workshop brochure won an award at the Fifth Annual Northeast National Pastel Exhibition 2009 that will be on exhibit at the Art Center of Old Forge in Old Forge, NY.

The exhibit runs from June 13 – July 12, 2009.

Stanley will be teaching a 5-day workshop for us July 26 – August 1, 2009. He will be teaching drawing and pastel.

He is the author ofDrawing Nature and Drawing Trees. (Unfortunately, these books are out of print and in high demand on ebay!) Learn direct from the source!

Art is the business of seeing and Stan has designed his drawing class to encourage you to learn to see. Class is structured to help you discover the drama taking place, to approach the subject with inspiration and craftsmanship and to enjoy working outdoors. Over the course of the week Stan demonstrates techniques using drawing media such as charcoal, graphite, conte, pastel, and pastel pencil. Teaching themes include composition, improvised and planned drawing, and capturing the mood of the moment.

Stanley provides individual demonstrations and one-on-one instruction daily while painting on location.


Loosen Up and Paint Like Crazy with Robert Burridge

What a guy! Bob Burridge is here teaching a full workshop of eager and happy students. I wish I could join in the fun.

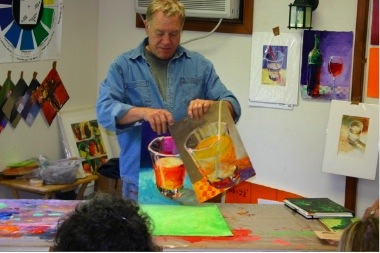
Bob gives demos throughout the day. Love his use of color and sense of play.


Bob set up his command center in the back corner of the studio. He said that the lighting in the studio and from the windows was terrific!


Here is a shot of one of the student’s work tables. Such color and expression.

Today is day 3 of the workshops so there will be more pictures to come. But tonight is my night for cooking dinner, so I’ll be busy, as usual!

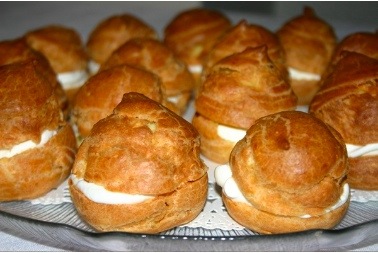
But speaking of food — look at these great cream puffs that Mark and Brian made for cookie time yesterday.

The cream had a slight hint of rose water. Yummy. I think they should have been topped with chocolate! But that’s just my idea.


Tempting the Muse with Laura Cater-Woods

Laura Cater-Woods arrived from Montana on Sunday with her dog buddy, Beau, and her studio assistant, Becky. The workshop retreat began on Monday when all the students arrived for the wine and cheese reception, followed by dinner.

It has been a busy week for me in the office and today was the first time I had the opportunity to slip into the studio to take pictures. I caught them in the middle of doing a critique.

They are looking at the work that Josie McD. has been doing in class. Josie is working in watercolor and acrylics, instead of fiber for this workshop.

Here are some small thread work studies.


I believe that this is dyed/painted paper. I wasn’t there for this, so I’m not sure. Dang! I’m missing all the good stuff. 😉


This is a whole cloth piece that has been layered and stitched first, and then painted. Very nice effect.


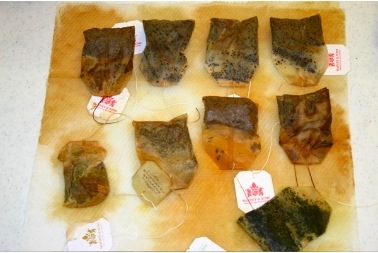
Laura has the group collecting tea bags for some as yet unshown technique! Very curious. Tea and cookies in the afternoon has helped to boost the collection.

This is something that Debbie DiG. is working on. She is hoping to incorporate word/text into her landscape.


And here is Beau, classroom mascot and all around good dog. I can’t imagine our wild hounds lose in a studio full of fabric, especially Hudson!

Everyone is really enjoying the class and lively conversation at the dinner table continues long after the last bite of dessert is gone.

(Dessert update: Monday is was hand-made chocolates. Tuesday was Peanut Butter Pie with Oreo Crust and Blackberry sauce. Wednesday was Peppermint Brownie Pie. Tonight will be Apple Tart!)


More Merry Minchin Moments

Sadly it is the final day of the Ted Minchin workshop here at Hudson River Valley Art Workshops. The week always goes by so quickly.

Today Ted is having them work with layers.


I absolutely love this painting by Julie G.!


This is the sister duo in the workshop – Ann and Ellen. Ann is of Green Brothers Coffee fame (married to one of the brother’s). She brought us a bag of Peaberry coffee beans. My favorite.


“Sir” Ted Minchin is Here Teaching Watermedia

Edward Minchin (aka Sir Ted) is here at Hudson River Valley Art Workshops teaching abstract to semi-realism with watermedia.

Everyone in the class is having a blast. Ted is a very encouraging teacher and also has a million funny stories!


Everyone is all smiles in this group. Here you see Susan, Julie, and Renee, all from Canada. That’s Ted in the blue shirt!

Here is Ted using a sheet of plexi-glass over a students painting to suggest some improvements.


Every morning Ted brings out a new set of his paintings to display on the wall shelf in the studio. All of the paintings you see in this photo were painted on Yupo paper.


This is Julie, also from Canada. Canada was well represented in this workshop!

Still two more full days of workshop happening and I’ll be taking more pictures this afternoon.

The next workshop coming up is a fiber art workshop with Laura Cater-Woods. She is driving here this time (from Billings, Montana) and tells me that she is bring LOTs of goodies for the class to play with.


Lyrical Watercolor with Barbara Nechis

Barbara Nechis, a marvelous watercolor artist and instructor from Calistoga, California, is here at the Hudson River Valley Art Workshops teaching a 3-day workshop.

Here is Barbara during a class critique on the second day.


While lots of fun is going on in the studio during the workshop, conversations around the dinner table can get quite lively! This is one of the great things about taking a workshop at the Hudson River Valley Art Workshops.

Our all-in-one location allows and encourages the whole group to bond and inspire each other.

Barbara is always so cheerful!

The group is here for one more day (Sunday) and then our next workshop, with Ted Minchin, checks in Sunday afternoon.

There is still room in Ted’s workshop, so don’t delay, give us a call to sign up now. He has a lifetime of funny stories to tell that you don’t want to miss – not to mention that he is a terrific instructor!


Rose Water, Saffron Pistachio Ice Cream

I just love rose water ice cream and I love pistachio ice cream and, well, everyone loves my banana saffron ice cream and their equivalent caramels. So, what better combination than rose water, saffron pistachio ice cream.

To my saffron ice cream base I add, before I put it into the machine, 1/8 cup of rose water and 3 cups of chopped pistachio. I use the Cuisinart to do a very course chop on the pistachios.

Saffron Ice cream base

1 qt heavy cream
1 qt 1/2 and 1/2
1 1/2 cup sugar (normally I use only 1 cup but felt that this should be a little sweeter.)
3 tea spoons saffron
2 table spoons vanilla paste (normally in my ice cream I only use 1 bean equiv. This is 2 bean equiv.)
10 egg yolks

Add
1/8 cup rose water
3 cups chopped, toasted but unsalted pistachios. (Do not use salted. I use raw pistachio and then lightly toast at 300 degrees for 15-20 minutes.)

Combine the heavy cream, 1/2 and 1/2, sugar, saffron and vanilla into a heavy sauce pan and bring to a boil. Take off the heat. Let steep at least 5 minutes, 10 is better. In this recipe, I use the vanilla paste, 2 T, which is the same as 2 beans. You can use 2 beans or you can use 2 t of vanilla extract. If you use the extract, put it in after you make the custard.

Reheat the mixture and after tempering the egg yolks, add into the base in a thin stream. Stir until either 170-180F or until the custard allows you to put a clean line through it on the wooden spoon. I use a spoon not a whisk. You do not want to put air into the ice cream. Stir all the time.

Strain into a bowl or a metal measuring cup. I strain because I don’t want to have saffron threads in my ice cream, just the taste. If you have not done the custard properly, straining will also take out any scrambled eggs. If you don’t want to, don’t strain, you’ll have threads in your ice cream which may not be a bad thing.

Put the ice cream into an ice bath. Now, if you have a great ice cream machine like mine, it takes hot ice cream into and churns until done, put in the rose water now and make your ice cream. If you don’t have a great ice cream machine and the ice cream has to be cold, then wait till the ice cream is cold from the bath, put in the rose water and then churn. Add pistachio as you churn. I add the pistachio almost immediately. I let it churn for about 30 seconds before I add the chopped pistachios.

It’s that simple. I made 3 batches, two with pistachio and one without, that is a saffron rose water ice cream sans nuts. Yummy. Now you can make this at home and pretend you are attending an art workshop or a fiber art workshop at the Greenville Arms.