One of the most popular desserts of last year was the Chocolate Beet Cake. A dense chocolatey cake that lets you also claim you are eating your vegetables! This cake is the only dessert of last year that we also serving this year – by popular demand.
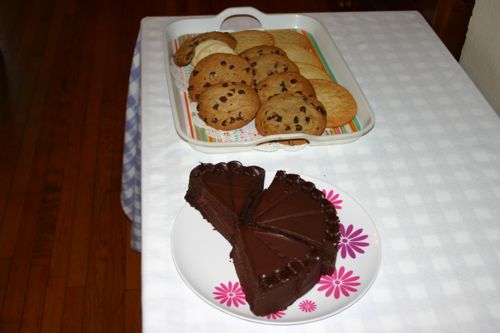
We’d like you to come to a workshop to enjoy this cake, but if you want to recreate it at home, here is the recipe.
Cake Ingredients:
2 medium beets, trimmed
1/2 Tbs vegetable oil
3/4 cup unsalted butter, softened
2 cups unbleached all-purpose flour
2/3 cup natural cocoa powder
1 tsp baking soda
1 tsp kosher salt
1 3/4 cup granulated sugar
2 large eggs
1 tap pure vanilla extract
Frosting Ingredients:
10 Tbs unsalted butter
1 cup granulated sugar
3/4 cup natural cocoa powder
3/4 cup heavy cream
1 top pure vanilla extract
1/2 tsp kosher salt
PREPARE THE BEETS (can be done a day or two before)
Position a rack in the center of the oven and heat the oven to 375°F. Put the beets on a piece of foil large enough to wrap them. Drizzle with the vegetable oil and turn to coast well. Enclose the beets in the foil and roast until tender when pierced with a paring knife, about 1 hour. Let cool.
MAKE THE CAKE
Preheat oven to 350°F. Coat two 9-inch round cake pans with pan spray. Dust the pans with flour, tapping out any excess. (We use cake pans with removable bottoms to make it easy to turn out the cakes.)
Peel and finely grate enough of the beets to make 3/4 cup. Sift the flour, cocoa, baking soda and salt into a medium bowl.
Using a stand mixer fitted with the paddle attachment or an electric hand mixer, beat the butter and sugar on medium-low speed until fluffy, about 3 minutes. Beat in the eggs, one at a time. Mix in the grated beets and the vanilla. Reduce the speed to low and carefully add half of the flour mixture; mix until fully incorporated. Add 1 1/4 cups hot water and the remaining flour mixture, return to medium-low speed and mix until smooth, about 2 minutes. Divide the batter evenly between the two prepared pans, smoothing the tops.
Bake the cakes, rotating halfway through baking, until a toothpick inserted in the center of the cakes comes out clean, about 25 minutes. Cool the cakes in their pans on a rack for 10 minutes and then turn them out onto racks. Let the cakes cool completely.
MAKE THE FROSTING
Melt the butter in a 3-quart saucepan over medium heat. Add the sugar and cocoa powder and mix until combined. Stir in the cream, vanilla and salt. Bring the mixture to a simmer and cook, stirring constantly, until smooth. Pour the mixture into a bowl and cool slightly. Refrigerate, stirring every 10 minutes, until soft peaks form and the frosting is completely cool, about 1 hour.
ASSEMBLE THE CAKE
Place one of the cakes on a cake plate and spread a generous 1/2 cup frosting evenly over the top. Top with the second cane and spread a generous 1/2 cup of frosting over it. Frost the sides with the remaining frosting.
HAVE YOUR CAKE AND EAT IT, TOO!
